vagrant で windows server 2012R2 を動かす
- vagrant-winrm プラグインのインストール
- windows server の vagrant box を make する
- packer のダウンロード
- vagrant box add
- Vagrantfile
test-kitchen の中の人が手順を公開しています。
基本的に手順の内容に沿えばいいのですが感動したので備忘として。
なお、環境は ubuntu-mate 16.04 で、 ruby 2.3.0p0 です。
vagrant-winrm プラグインのインストール
$ vagrant plugin install vagrant-winrm
windows server の vagrant box を make する
~/vagrant 配下で作業します。
$ cd ~/vagrant
$ git clone https://github.com/boxcutter/windows.git
$ cd windows
$ make virtualbox/eval-win2012r2-standard
rm -rf output-virtualbox-iso
mkdir -p box/virtualbox
packer build -only=virtualbox-iso -var 'cm=nocm' -var 'version=1.0.4' -var 'update=false' -var 'headless=false' -var "shutdown_command=shutdown /s /t 10 /f /d p:4:1 /c Packer_Shutdown" -var "iso_url=http://download.microsoft.com/download/6/2/A/62A76ABB-9990-4EFC-A4FE-C7D698DAEB96/9600.16384.WINBLUE_RTM.130821-1623_X64FRE_SERVER_EVAL_EN-US-IRM_SSS_X64FREE_EN-US_DV5.ISO" -var "iso_checksum=7e3f89dbff163e259ca9b0d1f078daafd2fed513" eval-win2012r2-standard.json
/bin/sh: 1: packer: not found
Makefile:428: ターゲット 'box/virtualbox/eval-win2012r2-standard-nocm-1.0.4.box' のレシピで失敗しました
make: *** [box/virtualbox/eval-win2012r2-standard-nocm-1.0.4.box] エラー 127
と、 packer がないと怒られました。
packer は hashicorp 社が提供するオープンソースのツールで、
ゴールデンイメージを作ったり vagrant box を作成したりするものです。
使ってみたいと思っていたのでタイムリー^^
というわけで packer をインストールします。
packer のダウンロード
公式からダウンロードして解凍し、パスの通ったところにバイナリを移動します。
/usr/local/src$ sudo wget https://releases.hashicorp.com/packer/0.10.1/packer_0.10.1_linux_amd64.zip
/usr/local/src$ unzip packer_0.10.1_linux_amd64.zip
packer  packer_0.10.1_linux_amd64.zip
/usr/local/src$ sudo cp packer /usr/local/sbin
/usr/local/src$ packer --version
0.10.1
もう一回 make
ここからの vmware 関連のパッケージをごにょごにょしていますが、たぶん不要です
私の無駄っぽい苦労ログに興味のある方以外は ### 再再再再再 make まで飛ばしてください
$ make
rm -rf output-vmware-iso
mkdir -p box/vmware
packer build -only=vmware-iso -var 'cm=nocm' -var 'version=1.0.4' -var 'update=false' -var 'headless=false' -var "shutdown_command=shutdown /s /t 10 /f /d p:4:1 /c Packer_Shutdown" -var "iso_url=iso/en_windows_server_2008_r2_with_sp1_vl_build_x64_dvd_617403.iso" -var "iso_checksum=7e7e9425041b3328ccf723a0855c2bc4f462ec57" win2008r2-datacenter-cygwin.json
vmware-iso output will be in this color.

Build 'vmware-iso' errored: Failed creating VMware driver: Unable to initialize any driver for this platform. The errors
from each driver are shown below. Please fix at least one driver
to continue:
* exec: "vmware": executable file not found in $PATH
* exec: "vmware": executable file not found in $PATH
* exec: "vmplayer": executable file not found in $PATH
* exec: "vmplayer": executable file not found in $PATH

==> Some builds didn't complete successfully and had errors:
--> vmware-iso: Failed creating VMware driver: Unable to initialize any driver for this platform. The errors
from each driver are shown below. Please fix at least one driver
to continue:
* exec: "vmware": executable file not found in $PATH
* exec: "vmware": executable file not found in $PATH
* exec: "vmplayer": executable file not found in $PATH
* exec: "vmplayer": executable file not found in $PATH


==> Builds finished but no artifacts were created.
Makefile:406: ターゲット 'box/vmware/win2008r2-datacenter-cygwin-nocm-1.0.4.box' のレシピで失敗しました
make: *** [box/vmware/win2008r2-datacenter-cygwin-nocm-1.0.4.box] エラー 1
rriifftt@X1:~/vagrant/windows$ sudo apt install vmrun
パッケージリストを読み込んでいます... 完了
依存関係ツリーを作成しています
状態情報を読み取っています... 完了
E: パッケージ vmrun が見つかりません
今度は vmrun がないと怒られます。。
http://askubuntu.com/questions/458198/xubuntu-vmware-player-missing-vmrun-utility によると、VIX SDK をインストールする必要がありそうです。
VIX SDK のインストール
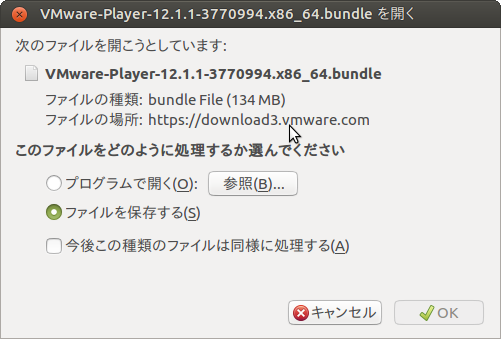
公式から普通にダウンロードしてみます。
.bundle ファイルってなんだ。。。
VMware を Ubuntu にインストールする - わかったつもりになるページ によると普通に実行すればよさそうです。
一旦実行してみます。
~/Downloads$ ls VMware-VIX-1.13.2-1744117.x86_64.bundle
VMware-VIX-1.13.2-1744117.x86_64.bundle
~/Downloads$ chmod +x VMware-VIX-1.13.2-1744117.x86_64.bundle
~/Downloads$ sudo sh VMware-VIX-1.13.2-1744117.x86_64.bundle
Extracting VMware Installer...done.
するとウィザードが開きます。

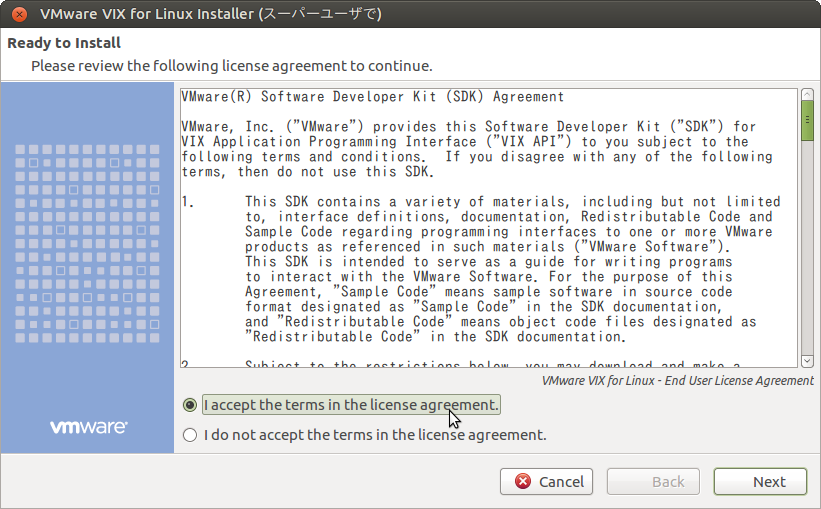
accept して next

インストール完了です。
再々 make
するも同じエラーで進まず。。。
vmware workstation player のインストール
次は無償で利用できる vmware workstation player をインストールを試してみます。

こちらも .bundle なので、同様に sh から実行してみます。
ウィザードでいろいろ聞かれますが、Lisence Key は空欄にして普通にインストールします。
再再再 make
ちょっとエラーが変わった。
$ make
rm -rf output-vmware-iso
mkdir -p box/vmware
packer build -only=vmware-iso -var 'cm=nocm' -var 'version=1.0.4' -var 'update=false' -var 'headless=false' -var "shutdown_command=shutdown /s /t 10 /f /d p:4:1 /c Packer_Shutdown" -var "iso_url=iso/en_windows_server_2008_r2_with_sp1_vl_build_x64_dvd_617403.iso" -var "iso_checksum=7e7e9425041b3328ccf723a0855c2bc4f462ec57" win2008r2-datacenter-cygwin.json
vmware-iso output will be in this color.

Build 'vmware-iso' errored: Failed creating VMware driver: Unable to initialize any driver for this platform. The errors
from each driver are shown below. Please fix at least one driver
to continue:
* exec: "vmware": executable file not found in $PATH
* exec: "vmware": executable file not found in $PATH
* Neither 'vmware-vdiskmanager', nor 'qemu-img' found in path.
One of these is required to configure disks for VMware Player.
* Neither 'vmware-vdiskmanager', nor 'qemu-img' found in path.
One of these is required to configure disks for VMware Player.


==> Some builds didn't complete successfully and had errors:
--> vmware-iso: Failed creating VMware driver: Unable to initialize any driver for this platform. The errors
from each driver are shown below. Please fix at least one driver
to continue:
* exec: "vmware": executable file not found in $PATH
* exec: "vmware": executable file not found in $PATH
* Neither 'vmware-vdiskmanager', nor 'qemu-img' found in path.
One of these is required to configure disks for VMware Player.
* Neither 'vmware-vdiskmanager', nor 'qemu-img' found in path.
One of these is required to configure disks for VMware Player.


==> Builds finished but no artifacts were created.
Makefile:406: ターゲット 'box/vmware/win2008r2-datacenter-cygwin-nocm-1.0.4.box' のレシピで失敗しました
make: *** [box/vmware/win2008r2-datacenter-cygwin-nocm-1.0.4.box] エラー 1
qemu が足りないっぽい。
$ sudo apt install qemu
$ make
rm -rf output-vmware-iso
mkdir -p box/vmware
packer build -only=vmware-iso -var 'cm=nocm' -var 'version=1.0.4' -var 'update=false' -var 'headless=false' -var "shutdown_command=shutdown /s /t 10 /f /d p:4:1 /c Packer_Shutdown" -var "iso_url=iso/en_windows_server_2008_r2_with_sp1_vl_build_x64_dvd_617403.iso" -var "iso_checksum=7e7e9425041b3328ccf723a0855c2bc4f462ec57" win2008r2-datacenter-cygwin.json
vmware-iso output will be in this color.

Build 'vmware-iso' errored: Couldn't find VMware tools for 'windows'! VMware often downloads these
tools on-demand. However, to do this, you need to create a fake VM
of the proper type then click the 'install tools' option in the
VMware GUI.

==> Some builds didn't complete successfully and had errors:
--> vmware-iso: Couldn't find VMware tools for 'windows'! VMware often downloads these
tools on-demand. However, to do this, you need to create a fake VM
of the proper type then click the 'install tools' option in the
VMware GUI.

==> Builds finished but no artifacts were created.
Makefile:406: ターゲット 'box/vmware/win2008r2-datacenter-cygwin-nocm-1.0.4.box' のレシピで失敗しました
make: *** [box/vmware/win2008r2-datacenter-cygwin-nocm-1.0.4.box] エラー 1
今度は VMware tools for windows か。。
VMware tools for windows
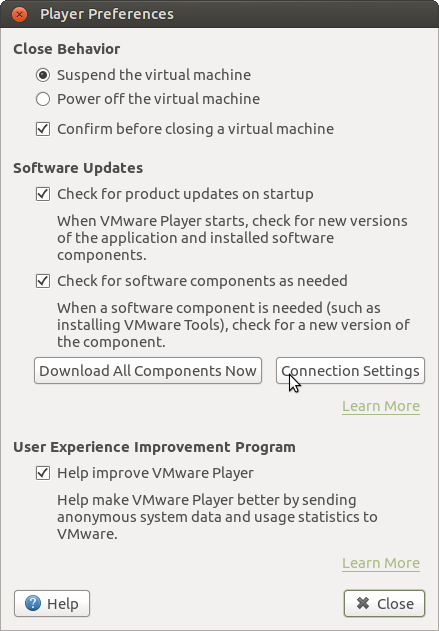
vmware workstation player の player preference からインストールできそうです。

いろいろとインストールされました。
再再再再 make
またエラーが変わりました。
$ make
rm -rf output-vmware-iso
mkdir -p box/vmware
packer build -only=vmware-iso -var 'cm=nocm' -var 'version=1.0.4' -var 'update=false' -var 'headless=false' -var "shutdown_command=shutdown /s /t 10 /f /d p:4:1 /c Packer_Shutdown" -var "iso_url=iso/en_windows_server_2008_r2_with_sp1_vl_build_x64_dvd_617403.iso" -var "iso_checksum=7e7e9425041b3328ccf723a0855c2bc4f462ec57" win2008r2-datacenter-cygwin.json
vmware-iso output will be in this color.

==> vmware-iso: Downloading or copying ISO
    vmware-iso: Downloading or copying: file:///iso/en_windows_server_2008_r2_with_sp1_vl_build_x64_dvd_617403.iso
    vmware-iso: Error downloading: open /iso/en_windows_server_2008_r2_with_sp1_vl_build_x64_dvd_617403.iso: no such file or directory
==> vmware-iso: ISO download failed.
Build 'vmware-iso' errored: ISO download failed.

==> Some builds didn't complete successfully and had errors:
--> vmware-iso: ISO download failed.

==> Builds finished but no artifacts were created.
Makefile:406: ターゲット 'box/vmware/win2008r2-datacenter-cygwin-nocm-1.0.4.box' のレシピで失敗しました
make: *** [box/vmware/win2008r2-datacenter-cygwin-nocm-1.0.4.box] エラー 1
あかん。挫けそう。
と、思ったら make 対象を指定していないことに気づきました。
もしかして vmware とか不要だった・・・?
再再再再再 make
$ make virtualbox/eval-win2012r2-standard
rm -rf output-virtualbox-iso
mkdir -p box/virtualbox
packer build -only=virtualbox-iso -var 'cm=nocm' -var 'version=1.0.4' -var 'update=false' -var 'headless=false' -var "shutdown_command=shutdown /s /t 10 /f /d p:4:1 /c Packer_Shutdown" -var "iso_url=http://download.microsoft.com/download/6/2/A/62A76ABB-9990-4EFC-A4FE-C7D698DAEB96/9600.16384.WINBLUE_RTM.130821-1623_X64FRE_SERVER_EVAL_EN-US-IRM_SSS_X64FREE_EN-US_DV5.ISO" -var "iso_checksum=7e3f89dbff163e259ca9b0d1f078daafd2fed513" eval-win2012r2-standard.json
virtualbox-iso output will be in this color.

==> virtualbox-iso: Cannot find "Default Guest Additions ISO" in vboxmanage output (or it is empty)
==> virtualbox-iso: Downloading or copying Guest additions checksums
    virtualbox-iso: Downloading or copying: http://download.virtualbox.org/virtualbox/5.0.18/SHA256SUMS
==> virtualbox-iso: Downloading or copying Guest additions
    virtualbox-iso: Downloading or copying: http://download.virtualbox.org/virtualbox/5.0.18/VBoxGuestAdditions_5.0.18.iso
    virtualbox-iso: Download progress: 62%
    virtualbox-iso: Download progress: 94%
==> virtualbox-iso: Downloading or copying ISO
    virtualbox-iso: Downloading or copying: http://download.microsoft.com/download/6/2/A/62A76ABB-9990-4EFC-A4FE-C7D698DAEB96/9600.16384.WINBLUE_RTM.130821-1623_X64FRE_SERVER_EVAL_EN-US-IRM_SSS_X64FREE_EN-US_DV5.ISO
    virtualbox-iso: Download progress: 0%
    virtualbox-iso: Download progress: 1%
    virtualbox-iso: Download progress: 2%
    virtualbox-iso: Download progress: 3%
進み始めました。 44min ほどかかるそうなのでしばし芋焼酎など飲みながら待ちます。
こいつ。。動くぞ。。。

終わった模様です。
==> virtualbox-iso: Gracefully halting virtual machine...
    virtualbox-iso: Removing floppy drive...
==> virtualbox-iso: Preparing to export machine...
    virtualbox-iso: Deleting forwarded port mapping for the communicator (SSH, WinRM, etc) (host port 3171)
==> virtualbox-iso: Exporting virtual machine...
    virtualbox-iso: Executing: export eval-win2012r2-standard --output output-virtualbox-iso/eval-win2012r2-standard.ovf
==> virtualbox-iso: Unregistering and deleting virtual machine...
==> virtualbox-iso: Running post-processor: vagrant
==> virtualbox-iso (vagrant): Creating Vagrant box for 'virtualbox' provider
    virtualbox-iso (vagrant): Copying from artifact: output-virtualbox-iso/eval-win2012r2-standard-disk1.vmdk
    virtualbox-iso (vagrant): Copying from artifact: output-virtualbox-iso/eval-win2012r2-standard.ovf
    virtualbox-iso (vagrant): Renaming the OVF to box.ovf...
    virtualbox-iso (vagrant): Using custom Vagrantfile: tpl/vagrantfile-eval-win2012r2-standard.tpl
    virtualbox-iso (vagrant): Compressing: Vagrantfile
    virtualbox-iso (vagrant): Compressing: box.ovf
    virtualbox-iso (vagrant): Compressing: eval-win2012r2-standard-disk1.vmdk
    virtualbox-iso (vagrant): Compressing: metadata.json
Build 'virtualbox-iso' finished.

==> Builds finished. The artifacts of successful builds are:
--> virtualbox-iso: 'virtualbox' provider box: box/virtualbox/eval-win2012r2-standard-nocm-1.0.4.
vagrant box add
手順に従って box add します。
$ vagrant box add windows-2012r2 ./box/virtualbox/eval-win2012r2-standard-nocm-1.0.4.box
$ vagrant box list
windows-2012r2 (virtualbox, 0)
Vagrantfile
用意されている template を利用するとよさそうです。
$ mkdir ~/vagrant/windows-2012r2
$ cp ~/vagrant/windows/tpl/vagrantfile-eval-win2012r2-standard.tpl ~/vagrant/windows-2012r2/Vagrantfile
Vagrantfile の config.vm.box を編集します。
# -*- mode: ruby -*-
# vi: set ft=ruby :

Vagrant.configure("2") do |config|
  config.vm.define "vagrant-eval-win2012r2-standard"
  #config.vm.box = "eval-win2012r2-standard"
  config.vm.box = "windows-2012r2"

  # Port forward WinRM and RDP
  config.vm.network :forwarded_port, guest: 3389, host: 3389, id: "rdp", auto_correct:true
  config.vm.communicator = "winrm"
  config.vm.guest = :windows
  config.vm.network :forwarded_port, guest: 5985, host: 5985, id: "winrm", auto_correct:true
  # Port forward SSH
  #config.vm.network :forwarded_port, guest: 22, host: 2222, id: "ssh", auto_correct:true

  config.vm.provider :virtualbox do |v, override|
    v.gui = true
    v.customize ["modifyvm", :id, "--memory", 1536]
    v.customize ["modifyvm", :id, "--cpus", 1]
    v.customize ["modifyvm", :id, "--vram", "256"]
    v.customize ["setextradata", "global", "GUI/MaxGuestResolution", "any"]
    v.customize ["setextradata", :id, "CustomVideoMode1", "1024x768x32"]
  end

  ["vmware_fusion", "vmware_workstation"].each do |provider|
    config.vm.provider provider do |v, override|
      v.gui = true
      v.vmx["memsize"] = "1536"
      v.vmx["numvcpus"] = "1"
      v.vmx["cpuid.coresPerSocket"] = "1"
      v.vmx["ethernet0.virtualDev"] = "vmxnet3"
      v.vmx["RemoteDisplay.vnc.enabled"] = "false"
      v.vmx["RemoteDisplay.vnc.port"] = "5900"
      v.vmx["scsi0.virtualDev"] = "lsisas1068"
    end
  end

  config.vm.provider :parallels do |v, override|
    v.customize ["set", :id, "--cpus", 1]
    v.customize ["set", :id, "--memsize", 1536]
    v.customize ["set", :id, "--videosize", "256"]
  end
end
起動してみます!
$ cd ~/vagrant/windows-2012r2
$ vagrant up
Bringing machine 'vagrant-eval-win2012r2-standard' up with 'virtualbox' provider...
==> vagrant-eval-win2012r2-standard: Importing base box 'windows-2012r2'...
==> vagrant-eval-win2012r2-standard: Matching MAC address for NAT networking...
==> vagrant-eval-win2012r2-standard: Setting the name of the VM: windows-2012r2_vagrant-eval-win2012r2-standard_1465130882039_49088
==> vagrant-eval-win2012r2-standard: Clearing any previously set network interfaces...
==> vagrant-eval-win2012r2-standard: Preparing network interfaces based on configuration...
    vagrant-eval-win2012r2-standard: Adapter 1: nat
==> vagrant-eval-win2012r2-standard: Forwarding ports...
    vagrant-eval-win2012r2-standard: 3389 => 3389 (adapter 1)
    vagrant-eval-win2012r2-standard: 5985 => 5985 (adapter 1)
==> vagrant-eval-win2012r2-standard: Running 'pre-boot' VM customizations...
==> vagrant-eval-win2012r2-standard: Booting VM...
==> vagrant-eval-win2012r2-standard: Waiting for machine to boot. This may take a few minutes...
    vagrant-eval-win2012r2-standard: WinRM address: 127.0.0.1:5985
    vagrant-eval-win2012r2-standard: WinRM username: vagrant
    vagrant-eval-win2012r2-standard: WinRM transport: plaintext
==> vagrant-eval-win2012r2-standard: Machine booted and ready!
==> vagrant-eval-win2012r2-standard: Checking for guest additions in VM...
==> vagrant-eval-win2012r2-standard: Mounting shared folders...
    vagrant-eval-win2012r2-standard: /vagrant => /home/rriifftt/vagrant/windows-2012r2
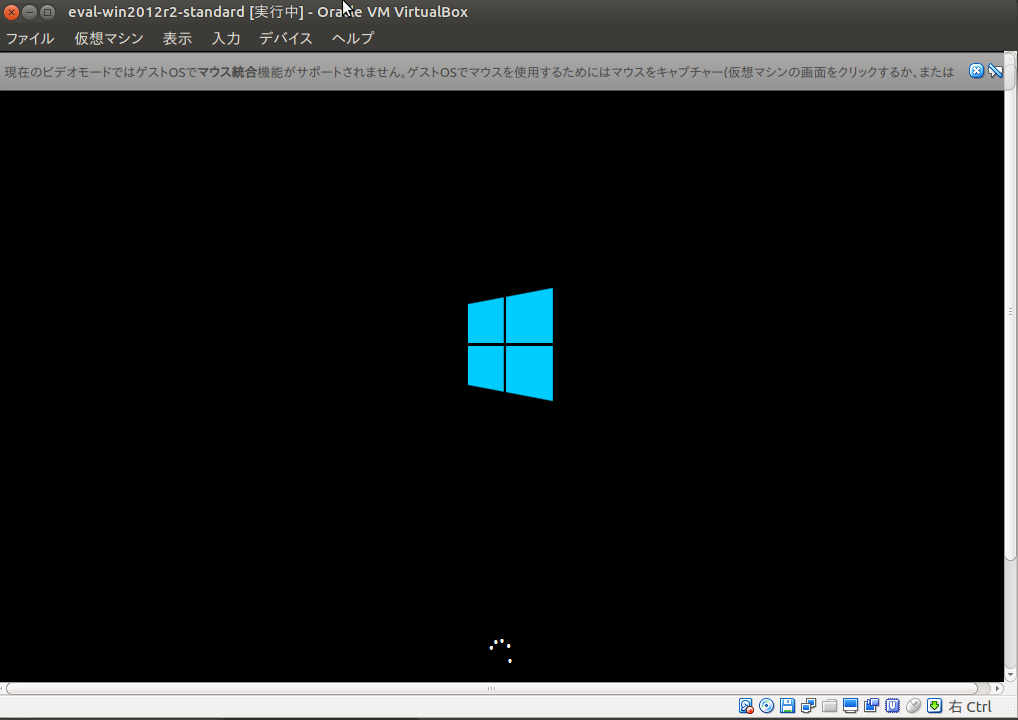
180 日間の無償評価版が起動しました!!!
ライセンス問題もセーフっぽいですね。

これでローカルでの test-kitchen が捗りそう。。。
その辺はまた後日。。。